
My son has been in his school chess club since preschool. He loves playing it. I’m not very good at it (he’s 6 and can beat me sometimes), but there’s one thing I’ve always loved: big garden chess boards that you walk around on top of to move big chess pieces. So I decided to build one.
The Design
I decided to build the pieces out of flat stock because it’s easy to get, affordable, and I know how to work it. I decided on a hinged base so they would fold and lay flat.
Aside: I discovered http://amazonsupply.com/ during this project. It's awesome!
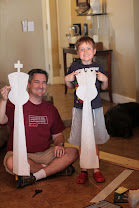
My son helped me design the pieces. He drew what he thought they should look like on Post-It notes and I sketched them on big butcher paper to make templates. The King is three feet tall. The Pawns are 2 feet tall and everything else is somewhere in between. It only takes 6 templates to make all 32 pieces, so that went pretty quick.
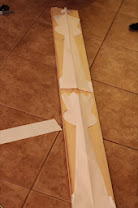
Then we traced the templates on to 1x8” pine. I bought 6’ pre-cut boards of select grade stuff and put 2 tall pieces or 3 pawns on a board.
Cutting
This part takes a while. You have to carefully cut 32 pieces out of 8” boards with a jigsaw or bandsaw. I bet if I had a bandsaw, I could cut out a stack of 2-4 pieces at a time. I don’t have a bandsaw. I bet if I transferred the templates to a piece of hardboard first, I could have cut them using a straight-cutting router bit with a guide bearing. I didn’t do that. I cut all 16 pawns the hard way.
Then I sanded everything and routed the edges so they’re rounded over. It makes the pieces feel nice in the hand.
Painting
My son picked the colors. He said the white side should match the rocks in our back yard and the black side should match the pool fence. He got his design skills from his mom. We put drop-cloths in the yard and put 1 coat of primer followed by 2 coats of paint on both sides of all 64 pieces (including bases). This was a good family part of the project: no power tools or loud noises, just a lot of painting.
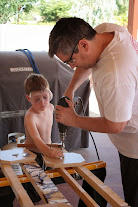
Assembly
This was another good family part of the project. Each piece needed a hinge attaching the base to the figure. Then each base needed an angle bracket and each figure needed a threaded insert. When you stand the piece up, a thumb screw goes through the bracket and into the insert.
The Board
The base of each piece is 9¼” wide. I went with 12” pavers to be the black squares on my board. The white squares are just the same gravel as the rest of the yard. It didn’t look quite right until I added the border of bricks all the way around. It makes it look like the white squares along the edges are part of a chess board, not encroaching yard.
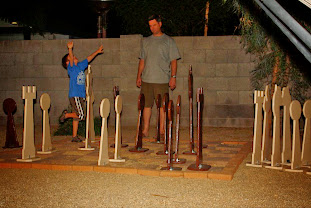
Playing
Dude. It’s strangely satisfying to walk around on top of a chess board, stepping between the pieces, looking at the game from different angles. Then you pick up a rook and walk it 6 feet. It’s really fun even if you’re not good at chess.
All together, this set took about 10 weekends of work (not totally full, just... a lot of work), but I'm glad I did it.